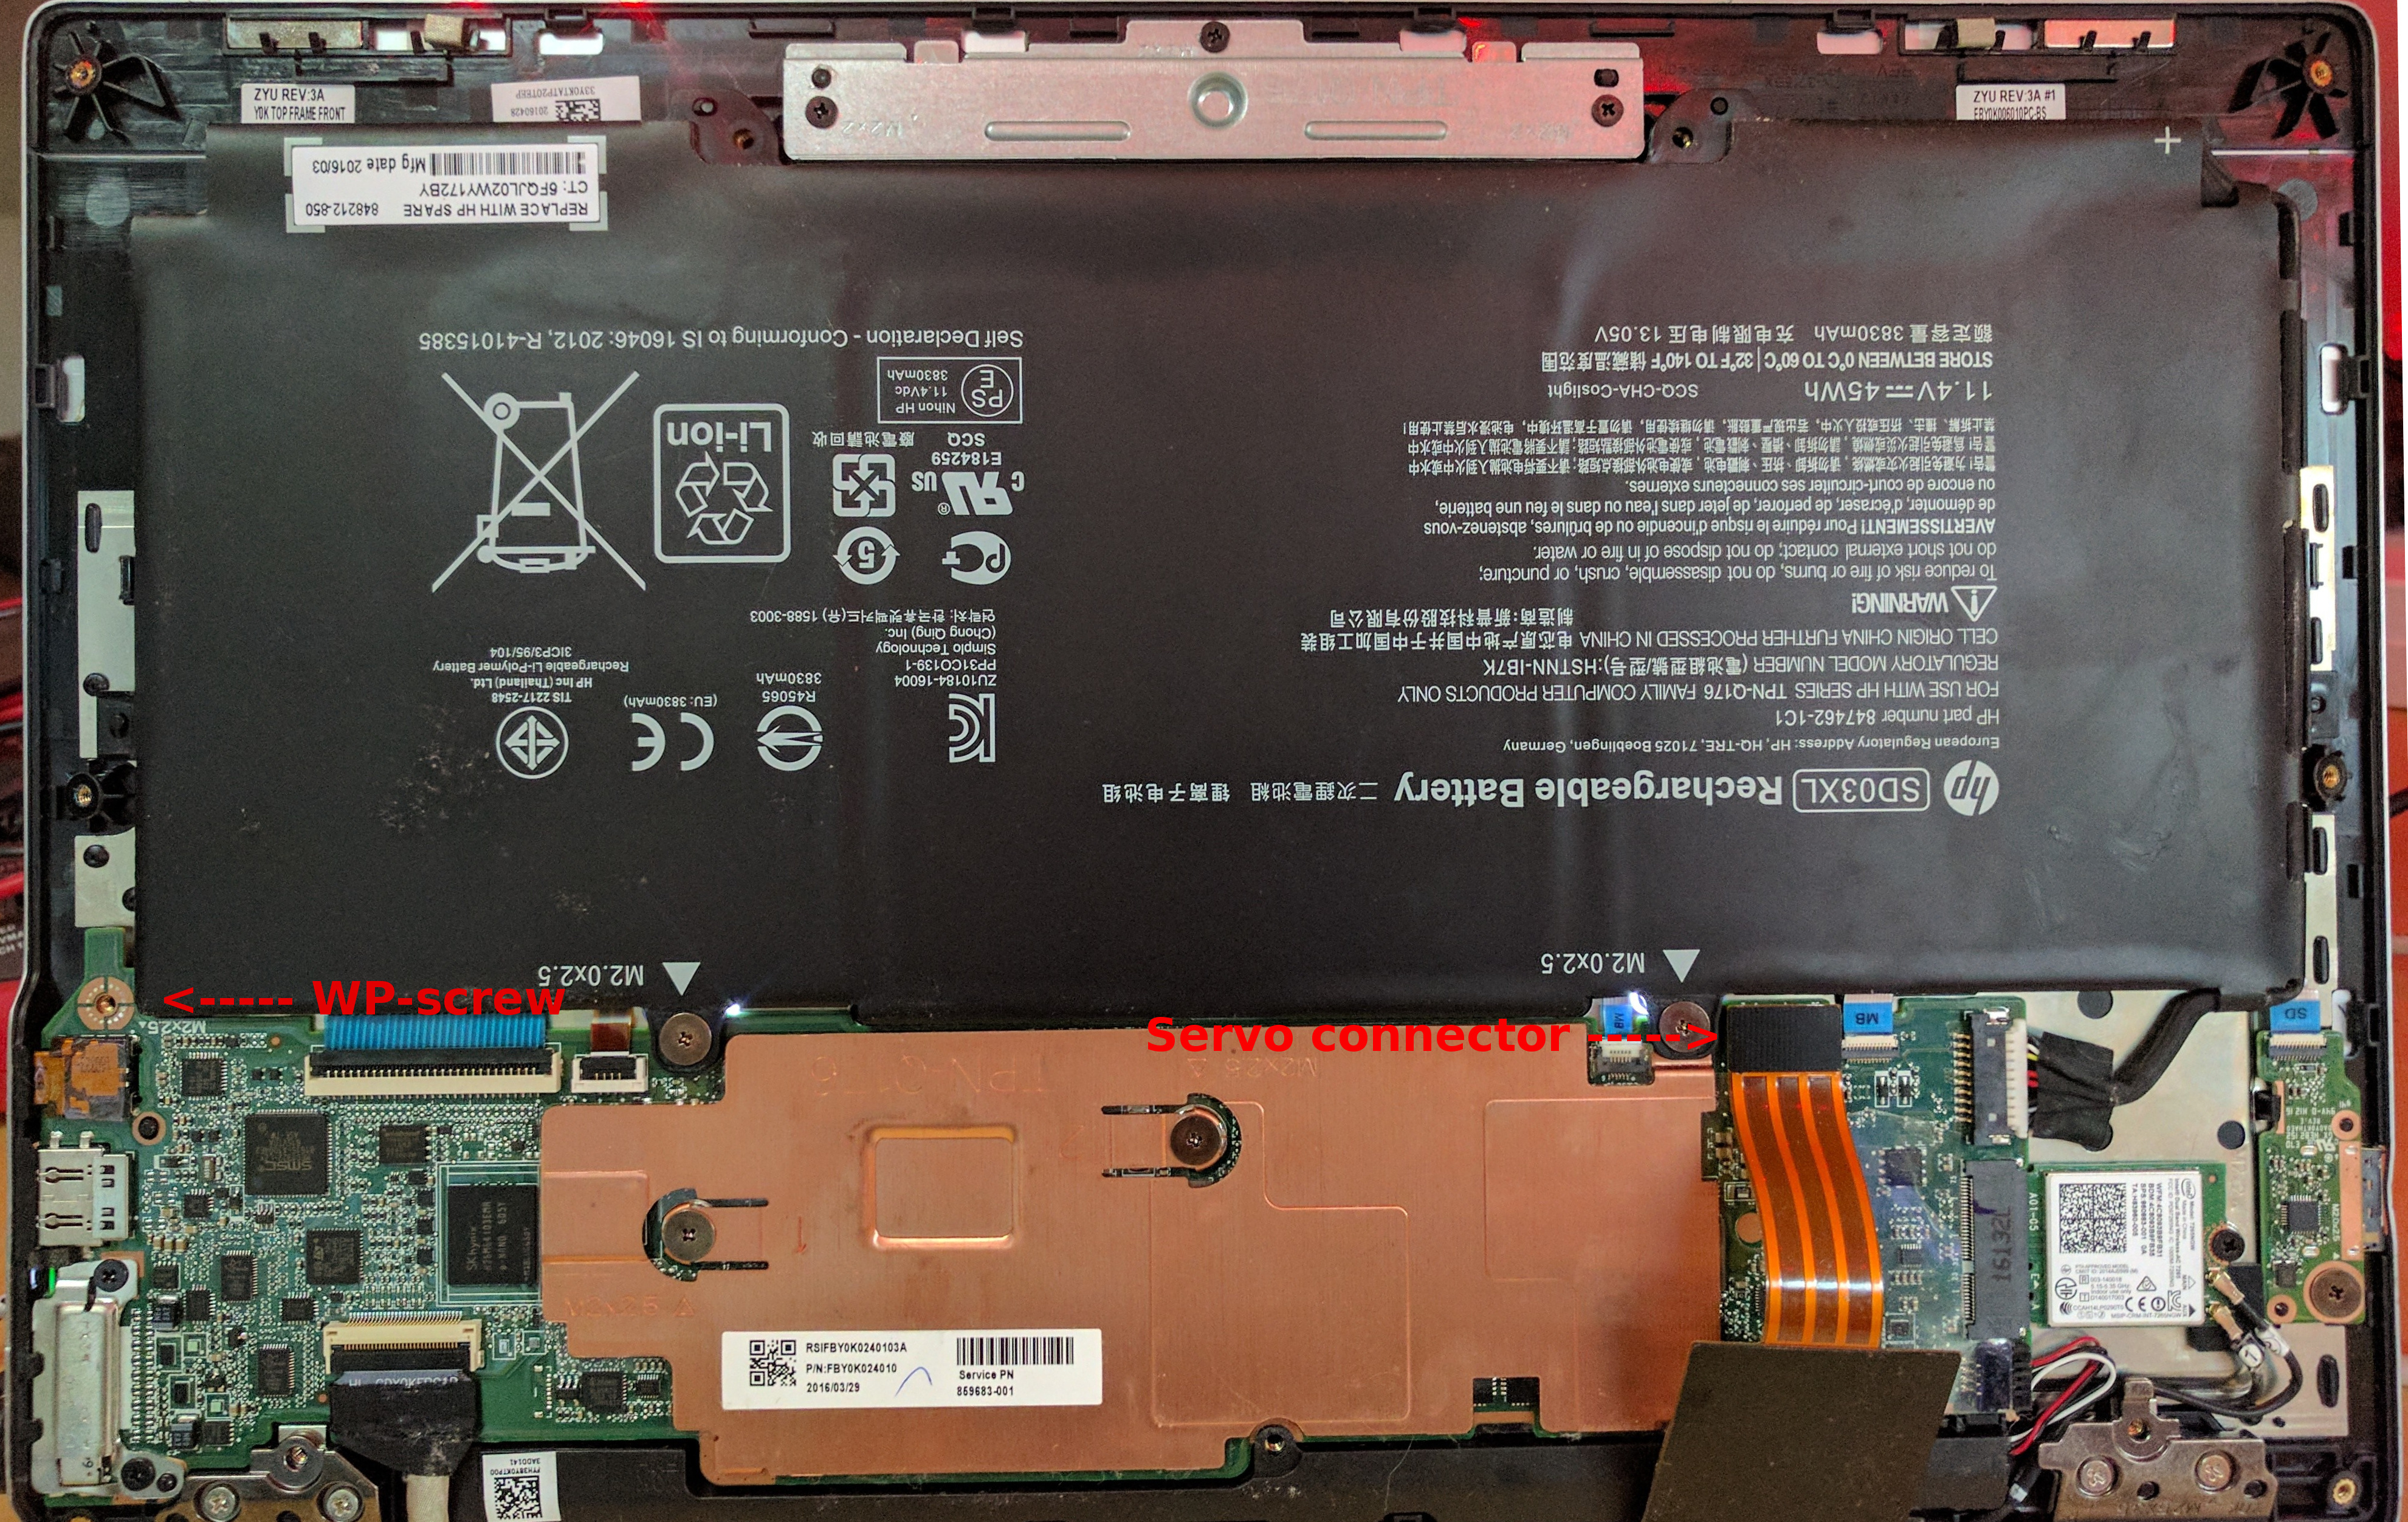
Removing the Chromebook Write-Protect screw
Published
Before being able to write firmware data to any production Chromebook device, the Write-Protect screw has to be removed.
This post will look specifically at removing the WP screw from a Chell (HP Chromebook 13 G1) device, and verifying that it has been successfully removed.
To actually flash firmware to Chromebook machines, a device called a Servo is needed. While these devices aren't available publicly, they can be produced freely or possibly requested from Google if you are contributing code to the ChromiumOS project.
Removing the Write-Protect screw
So this is what the WP screw looks like on a Chell Chromebook. This may or may not be what you will find in other devices. But if you take a close look, you will notice that the copper pad that the the screw attaches against is split into parts that are bridged by a screw being inserted.
Disable Write-Protect
So this is the part that requires a Servo device. And a ChromiumOS checkout, for some help setting one up, have a look at my previous post.
# Go to your ChromiumOS checkout
cd /opt/chromiumos

# Enter dev environment
cros_sdk

# Set device variable
export BOARD=chell

# Connect to Chromebook using a Servo device
sudo servod -b $BOARD &

# Disable WP
# This step may vary depending on the hardware of your actual Chromebook
dut-control fw_wp:off
sudo /usr/sbin/flashrom -p ft2232_spi:type=servo-v2 --wp-disable
sudo /usr/sbin/flashrom -p ec --wp-disable
References
ChromiumOS Servo
Setting up a ChromiumOS dev environment
Thanks
This post has been a part of work undertaken by my employer Collabora.
